Week 2 Lesson
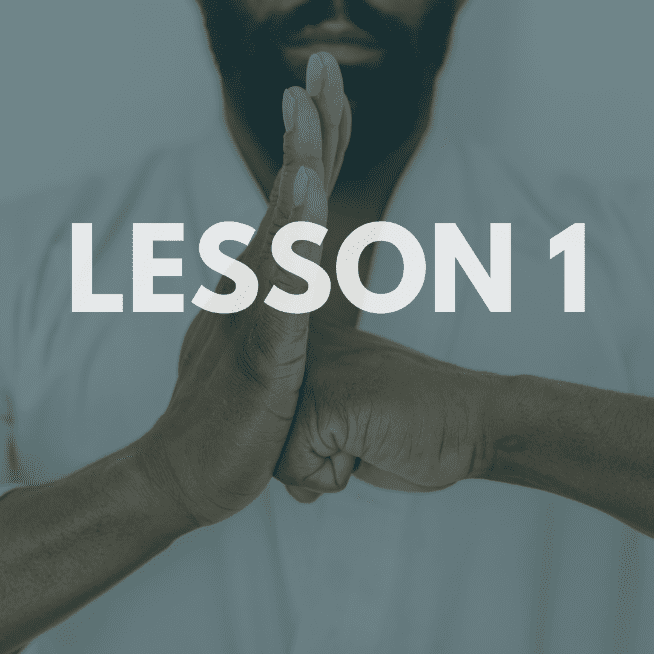
Assertiveness course
What is the meaning of assertive – it is another word for self-confidence. What has this got to do with self-defense? For you to be able to assert your will you must be confident to a certain degree that your actions will have their desired effect. With regards to the course, confidence goes a very long way.
Read More
Overview
In self-defense, assertiveness and confidence are critical tools for deterring potential threats. Assertive behavior projects a sense of self-assurance, boundaries, and control, making you less likely to be targeted. Confidence allows you to respond effectively to threats, as you’re more likely to act decisively in high-stress situations. This focus point will help you understand and build these qualities as integral parts of your self-defense approach.
Why Assertiveness Matters in Self-Defense
Assertiveness is the ability to communicate your needs, set boundaries, and express yourself firmly without aggression. It signals to others that you’re in control, self-aware, and unlikely to tolerate disrespectful or threatening behavior. Assertive behavior can serve as a powerful deterrent, especially in situations where an aggressor is looking for an easy target.
- Boundary-Setting: Assertive people set clear boundaries, verbally and non-verbally. Establishing a boundary can stop a potential threat from escalating.
- Calm Confidence: Assertiveness projects a calm, composed demeanor, showing that you are not easily intimidated.
- Self-Advocacy: Assertive individuals advocate for themselves and are more willing to say “no” in uncomfortable or potentially dangerous situations.
Building Confidence for Self-Defense
Confidence is closely linked to assertiveness, as it allows you to trust your instincts and respond to situations with control. In self-defense, confidence can help you overcome fear, maintain composure, and execute techniques effectively. Developing confidence in your abilities reduces hesitation and builds resilience, which can make a crucial difference in stressful encounters.
- Body Language: Confident body language includes an upright posture, steady eye contact, and controlled movements. This projects strength and self-assurance.
- Self-Belief: Building self-confidence is about believing in your ability to handle various situations. Practicing self-defense skills can reinforce this belief.
- Preparation: Confidence grows through preparation. Practicing techniques regularly helps you feel prepared and capable of responding effectively to threats.
DLS Practical Exercises for Assertiveness and Confidence
- Verbal Boundary Practice
- Objective: Practice asserting yourself verbally in situations where you feel your boundaries may be tested.
- Exercise: Stand in Fighting Stance with your hands up at chest level. Practice saying “Stay where you are” or “Stop” in a calm, firm voice. Focus on projecting your voice without yelling, maintaining steady eye contact, and standing tall.
- Goal: Increase comfort with verbally setting boundaries and controlling your space.
- Non-Verbal Boundary Exercise
- Objective: Use body language to project confidence and deter potential threats without speaking.
- Exercise: Stand with your feet shoulder-width apart, shoulders relaxed, and chin slightly raised. Practice maintaining direct eye contact with an imaginary aggressor for 5–10 seconds, without breaking your gaze or fidgeting.
- Goal: Build comfort in using eye contact and body posture to establish control and deter aggression.
- Daily Confidence Routine
- Objective: Incorporate confidence-building practices into your daily routine.
- Exercise: Each morning, stand in front of a mirror and recite positive affirmations (e.g., “I am capable and strong,” “I can handle challenges with confidence”). Then, practice a strong, balanced Fighting Stance for 1–2 minutes.
- Goal: Reinforce self-belief and create a mental habit of confidence before starting your day.
Section Drill: a. Assertiveness Reflection: Reflect on a past situation where you felt uncomfortable or threatened. Think about how assertiveness and confidence might have changed the outcome. Write a brief description of the scenario and list three ways you could have used assertiveness to establish boundaries or project confidence. b. Confidence-Building Journal: Keep a journal for one week, noting any situations where you practiced assertiveness, set a boundary, or felt particularly confident. Document how these experiences made you feel and any positive outcomes from applying assertive behavior. |
Key Takeaways for Assertiveness and Confidence
- Project Control: Assertiveness helps communicate your boundaries and self-assurance, making you a less likely target.
- Trust in Your Abilities: Confidence is built through regular practice and preparation, helping you act decisively when necessary.
- Combine Verbal and Non-Verbal Cues: Effective self-defense involves using both words and body language to deter threats and maintain control.
Section Assignment Assignment 1: Self-Affirmation Journal · Objective: Build internal assertiveness and confidence through positive reinforcement. · Instructions: o Write three self-affirmations each day that reinforce your ability to protect yourself (e.g., “I am strong and capable,” “I can assert my boundaries confidently,” “I have the skills to handle threats effectively”). o Reflect on how repeating these affirmations influences your mindset and confidence. o Submit a summary of your daily affirmations and reflections at the end of the week. Assignment 2: Verbal Assertiveness Practice · Objective: Strengthen external assertiveness by practicing clear, confident communication. · Instructions: o Practice assertive verbal commands in front of a mirror or with a partner. Use phrases like: § “Stay back!” § “I don’t want trouble. Leave me alone!” o Focus on: § Firm voice tone. § Eye contact. § Confident posture (standing tall, arms in a neutral but ready position). o Record yourself practicing these commands and review the video to identify areas for improvement. o Submit the recording or a written reflection on your progress. Assignment 3: Role-Playing Boundaries · Objective: Apply both internal and external assertiveness in simulated scenarios. · Instructions: o Ask a family member or friend to act as a potential threat in two scenarios: § scenario 1: Someone invading your personal space aggressively. § scenario 2: Someone verbally challenging or intimidating you. o Practice: § Taking a confident Stance. § Using clear verbal commands to assert boundaries. § Maintaining eye contact and composure. o Reflect on: § How you felt while asserting yourself. § Any difficulties you encountered and how you plan to address them. o Write a 1-2 paragraph reflection on what you learned from the exercise.
|
Assertiveness course– what is the meaning of assertive – it is another word for self-confidence. What has this got to do with self-defense?
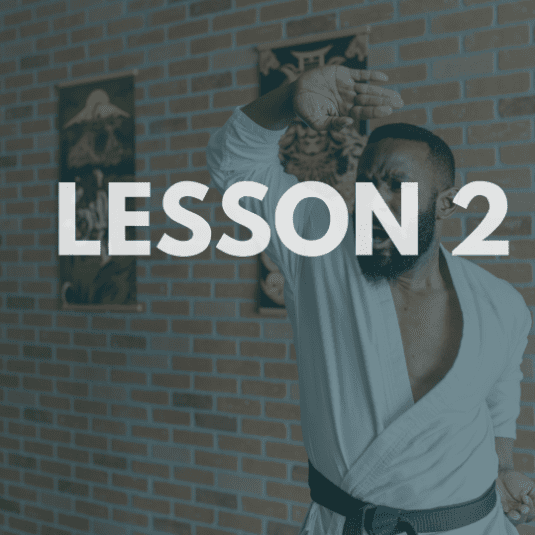
Fear and natural reaction
Fear is a natural response to perceived danger, and it can be both a valuable tool and a potential obstacle in self-defense. Effective fear and threat management allows you to harness fear to stay alert and make quick, clear decisions while remaining calm. This section will guide you through understanding fear, recognizing different threat levels, and using DLS-specific techniques to control your response in high-stress situations.
Read More
DLS Threat Recognition and Assessment
Effective threat management begins with early recognition and assessment. Observing your environment and reading body language allows you to detect potential threats before they escalate, helping you decide whether to de-escalate, maintain distance, or take defensive action.
Levels of Threat
- Low-Level Threat: Includes uncomfortable or invasive behavior, such as someone standing too close or making direct, unbroken eye contact.
- Medium-Level Threat: Involves verbal aggression, raised voice, or gestures indicating potential hostility.
- High-Level Threat: Includes physical aggression or a clear intention to harm, such as aggressive posturing, clenched fists, or an attempt to grab.
Threat Recognition Techniques
- Situational Awareness: Continually scan your surroundings, observing exits, potential obstacles, and any unusual behavior. Being aware of these details prepares you to respond quickly if needed.
- Non-Verbal Cues: Notice aggressive body language, like clenched fists, intense staring, or an invasion of personal space.
- Verbal Cues: A raised voice, aggressive tone, or provocative language often signals an escalating threat.
DLS Techniques for Managing Fear and Threats
The DLS approach combines practical fear management techniques with effective threat assessment, enabling you to act confidently and make strategic decisions under pressure. (S.I.B.R)
- Situation Analysis – Situation Analysis is the process of evaluating the circumstances and variables surrounding a threat or confrontation. It involves gathering and interpreting information to understand the nature of the threat, the environment, and the available options for response
Purpose:
- Assess Risk: Determine danger levels.
- Formulate Strategy: Plan your response.
- Enhance Decision-Making: Make informed choices under pressure.
Components:
- Identify the Threat: Recognize the aggressor and any weapons.
- Evaluate Intent: Understand the aggressor’s motivations.
- Assess Capabilities: Gauge the aggressor’s strength and skills.
- Location: Consider your setting.
- Accessibility: Identify exits and escape routes.
- Visibility: Assess lighting and cover.
- Physical Condition: Evaluate your physical state.
- Mental State: Check your emotional and psychological condition.
- Resources: Identify available self-defense tools.
- Intent Assessment – Intent assessment in self-defense is the process of evaluating the threat level posed by an aggressor to determine the appropriate response. It involves observing the behavior, body language, and verbal cues of the potential threat to understand their intentions
Purpose: Evaluate the threat level for an appropriate response.
Components:
- Behavioral Observation: Monitor changes in actions.
- Verbal Cues: Listen for threats or aggressive language.
- Body Language: Watch for signs like clenched fists.
- Environmental Context: Assess factors that may escalate the situation.
- Past Behavior: Consider history of violence.
- Boundaries (Setting & Enforcing) – Boundaries are limits or rules you establish to protect your physical, emotional, and psychological well-being. They define how you expect to be treated and what you will or will not tolerate in interactions with others. Types of boundaries are;
- Physical: Personal space and physical interactions.
- Emotional: Protecting your feelings.
- Psychological: Safeguarding thoughts and mental health.
Purpose: Protect your physical, emotional, and psychological well-being.
Components:
- Identify Needs: Reflect on your comfort levels and limits.
- Define Limits: Clearly articulate acceptable behaviors.
- Communicate Clearly: Use assertive language and non-verbal cues.
- Establish Consequences: Specify actions if boundaries are violate
Enforcing Boundaries:
- Assertiveness: Stand firm and manage responses calmly.
- Action Steps: Follow through with consequences.
- Seek Support: Involve authorities if needed.
- SelfCare: Reflect, adjust boundaries, and seek emotional support.
- Reporting and Detailing – The process of accurately documenting the specifics of a self-defense incident. This includes providing a clear narrative of the event, describing the aggressor’s actions and behavior, detailing your defensive responses, noting any injuries and witnesses, and including any interactions with law enforcement. This thorough documentation is crucial for legal, medical, and personal records.
Purpose: Accurately document self-defense incidents for legal, medical, and personal records
Components:
- Incident Description: Clear narrative of events.
- Description of Aggressor(s): Physical characteristics and observed threats.
- Behavioral Observations: Detail aggressive behaviors and cues.
- Actions Taken: Document defensive actions.
- Witnesses: Note witnesses and their contact information.
- Injuries and Medical Attention: Report injuries and medical attention received.
- Environmental Context: Describe surroundings and relevant factors.
- Police Report: Include details of police involvement.
DLS Fear Management Techniques
- Controlled Breathing
- Purpose: Regulates adrenaline levels and steadies your heart rate.
- Application: Breathe in for a count of four, hold for four, and exhale for four. Repeat until you feel centered.
- Practice: Practice this technique daily to develop a calm, steady breathing pattern in stressful situations.
- Visualization
- Purpose: Mentally rehearsing responses to potential threats helps build confidence and reduce fear.
- Application: Before entering a public space, visualize handling different threat scenarios calmly and effectively.
- Practice: Set aside a few minutes each day to visualize successful responses to various self-defense scenarios.
- Anchoring Technique
- Purpose: Using a physical or mental anchor refocuses your mind, redirecting fear into calm control.
- Application: When feeling fearful, press your thumb and forefinger together or silently repeat a calming phrase.
- Practice: Practice anchoring during mild stress to make it an automatic response under pressure.
DLS Threat Management Techniques
- Exit and Positioning Awareness
- Purpose: Identifying exits and positioning yourself strategically allows for quick, safe exits if a situation escalates.
- Application: Upon entering any space, mentally note at least two exits and position yourself near one if possible.
- Practice: Practice this awareness at home or in familiar environments, making it second nature.
- Controlled Step-Back
- Purpose: This technique creates physical distance and allows for an assessment of the aggressor’s reaction.
- Application: Take a deliberate step back to establish personal space while observing the threat. Adjust based on the aggressor’s response.
- Practice: From Fighting Stance, practice controlled step-backs to develop balance and space control.
- Verbal Boundary Setting
- Purpose: Asserting boundaries verbally can discourage a threat from advancing.
- Application: Use clear statements like “Stay back” or “Please don’t come any closer,” maintaining steady eye contact.
- Practice: Practice boundary-setting statements aloud, focusing on voice tone, eye contact, and confidence.
- Pivot Technique
- Purpose: Pivoting around an aggressor keeps them in view while protecting your centerline.
- Application: In a confined space, pivot in a half-circle around the aggressor rather than stepping backward, maintaining a stable Stance.
- Practice: Practice pivoting in a small circle around an imaginary aggressor to develop spatial awareness.
Section Drill: a. Fear Reflection Journal · Objective: Reflect on a past situation that triggered fear. Write down the physical and mental reactions you experienced and note how controlled breathing, visualization, or anchoring could have helped manage that fear. b. Threat Observation Exercise · Objective: Spend time in a public area, observing exits, nearby obstacles, and people’s behavior. Identify at least two exits and any unusual behavior, practicing early threat recognition. Document observations in a journal. |
Key Takeaways
- Channel Fear Productively: Use breathing, visualization, and anchoring techniques to control fear, allowing for clear, calm decision-making.
- Recognize and Respond to Threats: Use situational awareness, verbal cues, and physical positioning to assess threat levels and respond accordingly.
- Set Boundaries with Confidence: Combine verbal commands with physical cues to establish personal space and discourage further aggression
Section Assignment Assignment 1: Situational Analysis and Strategy Development · Choose a realistic self-defense scenario (e.g., being followed while walking home, facing a verbally aggressive individual). · Conduct a Situational Analysis by addressing the following: o Identify the Threat: Describe the aggressor and their potential intent. o Evaluate the Environment: Note the location, lighting, exits, and any available resources for defense. o Formulate a Strategy: Develop a step-by-step plan to de-escalate, defend, or escape. · Write a 1-2 paragraph summary of your Situational Analysis and Strategy. Assignment 2: Setting and Enforcing Boundaries · Practice setting boundaries in a controlled setting: o scenario: Ask a friend or family member to simulate invading your personal space or verbally challenging you. o Task: Practice using both verbal (e.g., “Please step back!”) and non-verbal (e.g., confident posture) cues to assert boundaries. o Include: § How you communicated your boundaries clearly. § What consequences you established if your boundaries were violated. · Reflect in writing on the experience: o Did you feel confident? o Was your boundary respected? o How would you improve your response? Assignment 3: Reporting and Detailing a Hypothetical Incident · Write a detailed report for a hypothetical self-defense incident: o Incident Description: Describe what happened, including time, date, and location. o Aggressor’s Actions: Note their behavior, physical characteristics, and any verbal threats. o Defensive Actions Taken: Document your response, including verbal de-escalation and physical techniques used. o Witnesses: Include details of any bystanders or witnesses and their potential input. o Outcome: Describe how the situation ended, whether you escaped, sought help, or involved law enforcement. · Submit your report as though you were filing it for legal or personal records.
|
Reminder for Practice and Safety
As with all self-defense techniques, practice this week’s material slowly and with control, especially when learning new movements. Your goal is to build muscle memory and understand the mechanics of each technique before applying speed or force. Ensure that you have a safe practice space and, if practicing with a partner, communicate clearly to avoid any accidental injuries.
Fear and natural reaction – best way to overcome (practice and knowledge)– the natural reactions to fear are the 3 f’s – fight, flee and freeze. The last two come very naturally to most.
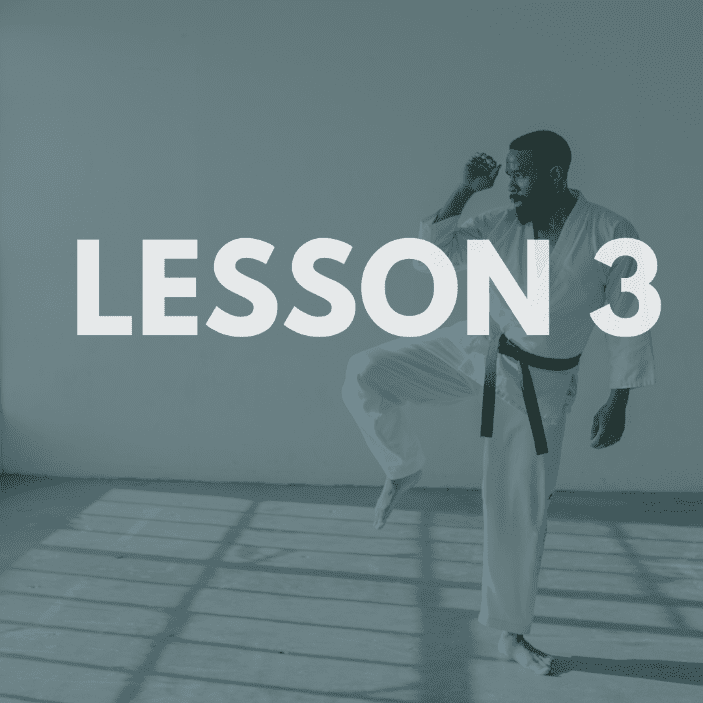
Introduction to Grabs, Holds and Chokes
Close-quarter encounters often involve an aggressor attempting to grab, hold, or choke to assert control. Learning to recognize, counter, and escape from these holds is essential for effective self-defense. This section covers practical techniques for defending against various types of grabs, holds, and chokes, emphasizing control, leverage, and escape
In situations where Strikes are ineffective or impossible, knowing how to use grabs, holds, and chokes can be vital. These techniques allow you to control an aggressor by manipulating their body to your advantage. These techniques can be applied regardless of the opponent’s size or strength.
Most grabs, holds, and chokes in this course focus on joint manipulation, Body Positioning and exploiting the body’s natural vulnerabilities to gain leverage over threat.
Read More
Grabs
Description: Grabs are quick and common close-contact moves where an aggressor seizes a part of your body—typically the wrist, arm, or shoulder—to immobilize or pull you closer. Grabs often happen in situations where the aggressor wants to control your movement or force you into a vulnerable position.
Application
- Common in situations where the aggressor is attempting to intimidate, pull you, or establish dominance.
- A quick grab, especially on the wrist or arm, can be used to unbalance or trap the defender.
Defense Against Grabs:
- Wrist Grab Escape: Rotate your wrist to the weak point in the aggressor’s grip (usually the thumb area) while pulling your arm away.
- Arm Grab Defense: Use your other arm to create leverage against the grab by pressing against the aggressor’s arm, stepping back to increase distance.
- Shoulder Grab Escape: Step back and twist your shoulder out of the grab, using your other hand to push against the aggressor’s arm.
Section Drill: Grabs a. Observation Practice: In a safe setting, have a friend gently grab your wrist or arm. Practice rotating your wrist or creating leverage to escape. Focus on finding the weak point in each grip. b. Reflection Exercise: Write a brief description of how you would feel and respond if someone grabbed you in a high-stress scenario. Consider how you might manage your fear response and react quickly. |
Holds
Description
Holds involve the aggressor attempting to immobilize you completely, often by using both arms to secure your torso or upper body. Common holds include bear hugs and arm wraps, which restrict movement and make it difficult to escape.
Application
- Holds are typically used when the aggressor wants to restrain or trap you, limiting your ability to defend yourself or move freely.
- Common in situations involving intimidation or forceful confrontation, holds are intended to restrict movement and control the defender.
Defense Against Holds
- Bear Hug (from the front): Lower your center of gravity by bending your knees slightly. Use your hands to create space by pressing against the aggressor’s hips or pushing under their arms. Pull back to break free.
- Bear Hug (from behind): Drop your weight, then stomp the aggressor’s foot or use a backward elbow strike to the midsection to create space.
- Arm Wrap Defense: Twist and pull your arm across your body to create leverage. Use the opposite arm to strike or push against the aggressor’s elbow joint, creating space for escape.
Section Drill: Holds a. Physical Practice: Using a pillow or resistance band, practice pulling or pressing to simulate the actions involved in escaping from a hold. Focus on maintaining a lowered center of gravity and using leverage to break free. b. Reflection Exercise: Think about a situation where you felt restricted or trapped (emotionally or physically). Write down how that made you feel and how you would react to regain control in a similar self-defense scenario. |
Chokes
Description
Chokes are among the most dangerous close-contact threats. An aggressor uses their arm or hands to apply pressure on your neck or throat, intending to restrict airflow and control movement. Chokes require quick and effective response to avoid loss of consciousness or further injury.
Application
- Common in high-intensity confrontations where the aggressor is attempting to overpower or subdue the defender.
- Chokes can escalate quickly, making it critical to respond with focus and control.
Defense Against Chokes:
- Front Choke Defense: Raise one arm high to create a frame, step back, and use your other arm to push down on the aggressor’s elbow or wrist to break their grip. Follow up with a knee or kick to their midsection for additional space.
- Rear Choke Defense: Lower your chin to protect your airway and pull down on the aggressor’s arm with both hands. Step to the side and use an elbow strike to their midsection or ribs to release their hold.
- Side Choke Defense: Turn into the aggressor to create space, then use your forearm to push against their grip. Step to the side to create leverage and strike their ribs or face if needed.
- Pluck Defense: Use both hands to pluck the attacker’s hands off your throat while simultaneously striking with your knee.
Section Drill: Choke a. Simulation Exercise: Stand against a wall and imagine a choke coming from different directions (front, back, side). Practice raising your arms and stepping away in the same motion to create space. This can help develop the reflex of protecting your neck and creating leverage. b. Reflection Exercise: Reflect on how you would handle a sudden, high-stress situation where someone attempts to choke you. Write down any physical or mental responses you anticipate and strategies you would use to remain calm and focused |
Safety Reminder for Take-Home Practice
Each of these techniques is powerful and should be practiced slowly and with control. If practicing with a partner, communicate clearly to avoid injury, and practice with light pressure. Ensure you have ample space for movement.
Section Assignment Assignment 1: Technique Practice and Recording · Practice the following techniques at home: 1. Wrist Release 2. Elbow Strike 3. Pluck Defense · Record a short video of yourself performing each technique and focus on: 1. Proper form and positioning. 2. Speed and precision. · Submit your video for feedback and evaluation. Assignment 2: scenario Analysis · Write a brief response to the following scenario: o Identify the technique you would use to break free (e.g., Wrist Release, Knee Strike). o Describe step-by-step how you would execute the technique, including any follow-up actions (e.g., creating distance, shouting for help). o Reflect on how the crowd might affect your Strategy (e.g., space constraints, visibility). Assignment 3: Reaction Speed Drill · Objective: Train Reaction Time to simulated grabs or holds. o Ask a partner or family member to lightly grab your wrist, simulate a bear hug, or approach for a mock choke hold. o Your task is to react quickly using the appropriate defense (e.g., Wrist Release, Hip Escape). o Repeat the drill 10 times, focusing on: § Accuracy of technique. § Reducing Reaction Time with each attempt. · Write a brief reflection on the exercise: o Which technique felt most natural? o What challenges did you face in reacting quickly? o How might you improve your performance? |
[gamipress_link label=”Completed!” href=”https://dls.ng/self-defense-week-3-individual/women-self-defense/”]
Introduction to grabs holds, and chokes- This section deals with how the defender (you) can use holds, grabs and chokes to achieve desired will.
Week 2 Lessons